The budget Ethereum mining rig gets an upgrade. We’re now over 50 Mh/s using 4 x MSi R7 370 graphics cards and a updated motherboard with plenty of pcie connectors.

See this rig before the upgrade https://www.youtube.com/watch?v=YJwwPvFa9cI

Hardware I’m using in this video

Intel Celeron G1840
US http://amzn.to/2blazf0
UK http://amzn.to/2aPSiEa

Asrock H81 Pro BTC
US http://amzn.to/2bl97JT
UK http://amzn.to/2bmdKjX

Msi R7 370 4GB £140 x 2
US http://amzn.to/1V7Dl2T
UK http://amzn.to/1UU6eA7

Evga 750GQ PSU £83
US http://amzn.to/27Wy6rF
UK http://amzn.to/1OTsClK

PCI-e 1x 16x Riser Cable Usb £10
US http://amzn.to/1qYeO3t
UK http://amzn.to/1Vr0nBJ

.

Tips are appreciated. Here’s my Addresses

Bitcoin 12v4d15AuopsVzudct7J8LJMm7qH95SxA1
Ethereum 0x5B905114167C80276AD28A997f606C698547fe40

nicehash-main

Testing the updated Nicehash miner V1.6.1.4

If you’ve not used the Nicehash miner before I’ll quickly explain how it works, because it’s a little different to other mining software. Nicehash is not just a miner, it connects to a market of buyers and sellers of hashing power and so when you mine using the Nicehash miner it will mine the most profitable coin with your hardware and then sell this on the open market in exchange for Bitcoins. So you can be mining Ethereum but you’ll actually be paid in Bitcoin.

Download Link – Nicehash Miner V1.6.1.4

Once you have downloaded and extracted the zip file to a folder of your choice, click the NiceHashMiner.exe to get started.

nicehash-folder

In the main window you’ll need to add your own bitcoin address and worker name as reference you can use to see your stats online. Then you want to click the Benchmark button.

nicehash-main

The benchmarking process tests your computers hardware to see how it perform when mining different coins and this data can then be used by Nicehash to decide which coins to mine and when for the best overall profitability.

Here’s the benchmark results from my two R7 370’s and you can see the coin algorithms in the center and hash speed on the right. The bench mark can take sometime to complete, a few minutes for each algorithm.

nicehash-benchmark

Once the bench is complete you can close the window and return to the main miner window.

Select the hardware you wish you use and then click the Start button. The miner will choose which mining algorithm is the most profitable and then start up the mining software for that coin. In my case Ethereum (DaggerHashimoto) is selected and the mining begins.

nicehash-mining-ethereum

After a short period of time you’ll see the earning summary being update and this confirms your hashrate and expected daily earnings and also your bitcoin balance at Nicehash. (payouts are done 3-4 times a day).

In testing I did notice that mining Ethereum using Nicehash the hash rate was 27.25 Mh/s and this is a little slower than the 28.08 Mh/s when using Claymore’s Dual Eth miner in Eth only mode. However the difference is a minor consideration when compared with the benefit of auto exchanging for Bitcoin.

Overall the miner performs well and should provide decent profits to miners without the hassle of switching mining software to match the days most profitable coin.


siacoin-sgminer-r7-370

Testing SGMiner 5.4.0 performance using 2 x MSi R7 370 4GB AMD GPU’s

I recently did a post on using the Marlin miner at the Siamining.com pool and in this post I wanted to do a comparison using another pool and different mining software.

SGMiner has been extensively tested and developed and is one of the most popular miners due to it’s performance and also the wide range of algorithms it supports. This miner can be used by Nvidia and AMD graphics cards.

Today we’re using a custom version which is best suited for use mining Siacoin and it can be downloaded using the link below.

Download Link – SGMiner 5.4.0 Siacoin GPU Miner

I tested the miner at the Suprnova pool and had my batch file configuration set like this

sgminer -k sia -o stratum+tcp://sia.suprnova.cc:2786 -u riskyfire.worker1 -p x -I 25

Using the 2 X R7 370’s installed in this machine and using their default clocks speeds of core 1030 memory 1400 I was able to get a average hash rate of 870 Mh/s around 435 Mh/s for each GPU.

siacoin-sgminer-default

When testing the cards with a overclocked core speed of 1150 mhz memory 1500 mhz the performance was improved by about 10% and increased the average hash rate to 978 Mh/s

siacoin-sgminer-r7-370

I did test the effect of changing the miner intensity but it didn’t seem to yield any obvious performance gains during this brief test.

I also tested this miner on another GPU a Gigabyte R9 280x using factory clocks speeds of core 1100 mem 1500 and it hashed at 910 Mh/s for comparison.

Overall this miner and pool combination performed very well and with no advantage or disadvantage in comparison to using the Marlin miner on the Siamining.com pool. A longer duration test or wider range of tested hardware might provide a better indication of the best combination but I think the time would be better spent on optimizing drivers, clock speed and voltage use to get the best overall performance and efficiency from mining Siacoin.


claymores-dual-eth-sia-miner5.3

Claymore has updated the Dual Eth miner so it now supports Eth + Decred or Eth + Siacoin mining.

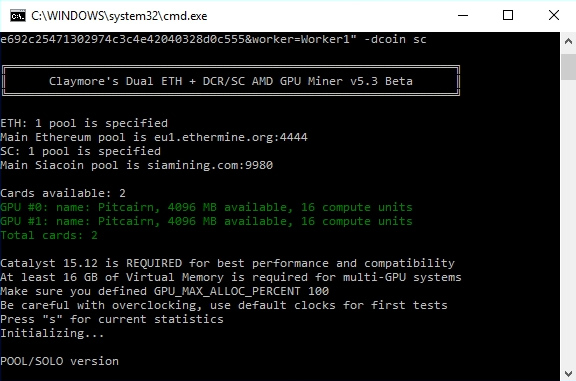
Claymore’s Dual Ethereum+Decred_Siacoin v5.3

This miner only supports AMD Graphics Cards.

I’ve already covered dual Ethererum + Decred mining in this video so I won’t go over that again here, I’ll just be focusing on Dual Ethereum and Siacoin mining using the updated miner.

Dual mining is great because it allows you to mine multiple coins at the same time without performance loss or using more electricity in most cases. You’re getting more bang for your buck and the miner should be more profitable overall.

The miner has lots of advanced features for multiple mining options, power control, temperature control but I’m keeping this simple so if you want the extra feature please see the readme included with the miner.

Setting up Dual Ethereum & Siacoin Mining.

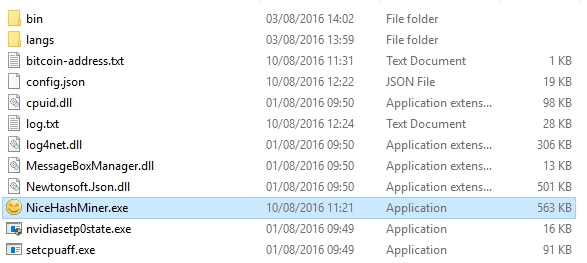
Once you have download and extracted the miner, inside the folder you’ll see some start.bat files and these files are used to start the miner with your configurations setting such as your wallet address and which pool you want to connect to.

Here’s the folder with the Start-Eth-Sia.bat opened

dual-miner-eth-sia-folder

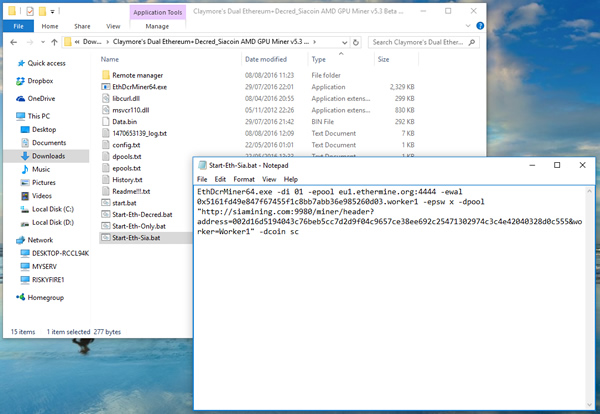
Here’s the text inside the Start-Eth-Sia.bat

EthDcrMiner64.exe -epool eu1.ethermine.org:4444 -ewal 0x5161fd49e847f67455f1c8bb7abb36e985260d03.worker1 -epsw x -dpool “http://siamining.com:9980/miner/header?address=002d16d5194043c76beb5cc7d2d9f04c9657ce38ee692c25471302974c3c4e42040328d0c555&worker=Worker1″ -dcoin sc

The first part is for mining ethereum using the ethermine.org pool and my address and my worker (nickname)

-epool eu1.ethermine.org:4444 (the pool I’m using)

-ewal 0x5161fd49e847f67455f1c8bb7abb36e985260d03.worker1 (my eth address and nickname)

-epsw x (password)

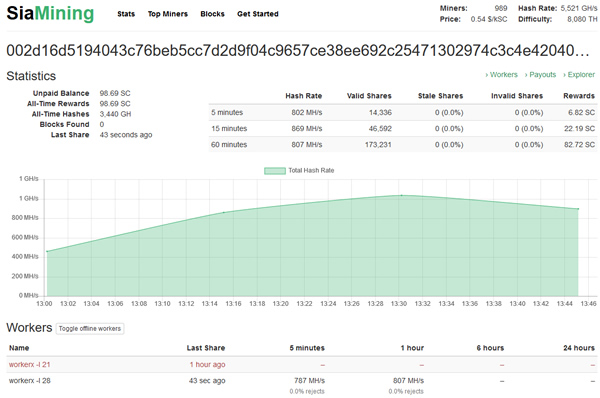
The second part is for mining Siacoin at the pool Siamining.com (this time is all the details are integrated into one line)

-dpool “http://siamining.com:9980/miner/header?address=002d16d5194043c76beb5cc7d2d9f04c9657ce38ee692c25471302974c3c4e42040328d0c555&worker=Worker1″

-dcoin sc (sets the miner to Siacoin)

Quick Miner Setup

For the quickest setup you only need to swap the green text (my addresses) for your own Ethereum address and your Siacoin address and then save the file as a .bat (ensure its not saved as .bat.txt)
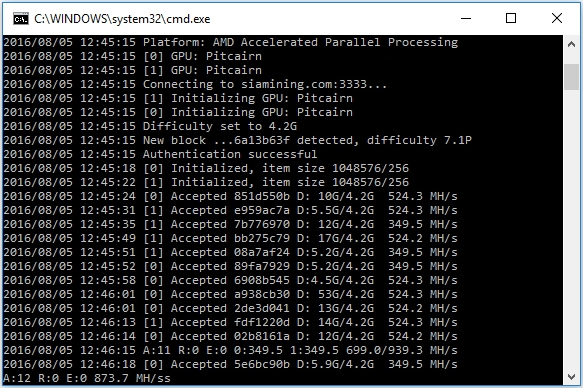
My Results

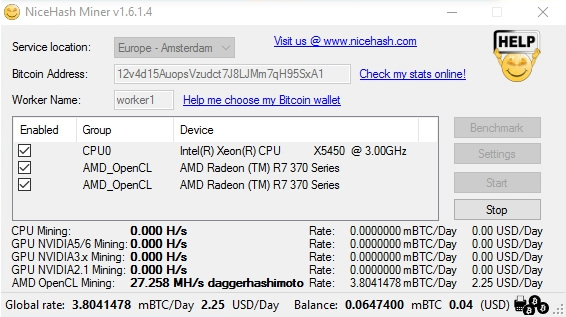
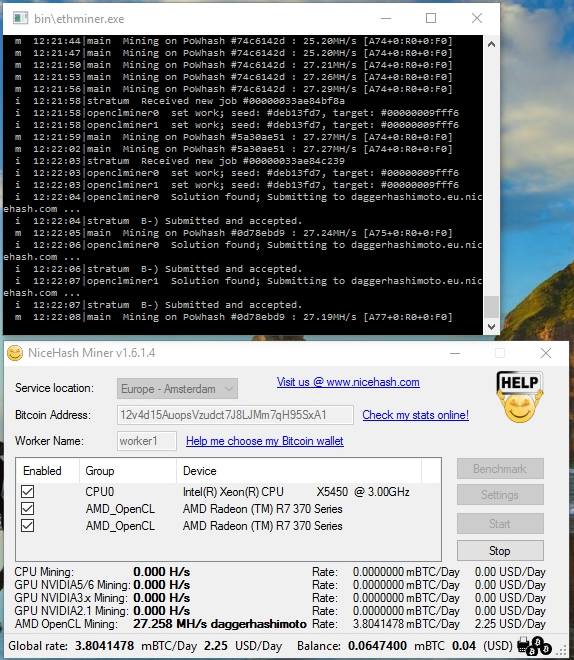
I’ve tested this miner on my 2 X MSi R7 370 4GB Rig (Overclocked Core 1150 Mem 1500) and these are my results

Eth + Sia

Ethereum 25 Mh/s

Siacoin 372 Mh/s

Eth + Decred

Ethereum 26.9 Mh/s

Decred 404 Mh/s

Eth Only

Ethereum 28.25 Mh/s


sia-gpu-600x

Instruction guide for mining Siacoins using your AMD or Nvidia Graphics Card (GPU Mining).

Step1. Get a Siacoin address (guide on wallet/address creation) or alternative you can use an exchange address to receive your siacoin rewards from the pool.

Step2. Download the Marlin Siacoin Miner which is currently the best and most compatible miner for GPU mining.

Step3. Unzip the miner files to a folder on your computer.

Step4. Edit the Start.bat file with notepad and update it with your details. There’s only two parts that need to be changed

SET address=002d16d5194043c76beb5cc7d2d9f04c9657ce38ee692c25471302974c3c4e42040328d0c555

Change this to your own address

SET worker=workerx

Change this to a nickname of your choice

sia-miner-batch

Here’s what our Start.bat file contains

:: Batch file sample for Marlin
:: Written by Xurious for SiaMining.com
:: Sia Address: 00091d9619f1e697ddf80e751b68baffc444e7b59eeb54e131f136711d84aebf3bc6e0b820af
:: Updated 2016-08-04
::
:: Your Payout Address.
SET address=002d16d5194043c76beb5cc7d2d9f04c9657ce38ee692c25471302974c3c4e42040328d0c555
:: Worker Name.
SET worker=workerx
:: Intensity. 21 is great for normal desktop usage. 28 is typical for mining.
SET intensity=21
::
marlin.exe -u %address%.%worker%” -I %intensity%

Save the file. Ensure it saves as .bat and not .bat.txt

Step5. Double click on the Start.bat icon to start the Siacoin Miner.

Here’s my results from two MSi R7 370 4GB = 939 MH/s

siacoin-marlin-miner

Step6. Check your stats on the Siamining.com pool by visiting the website and entering your Siacoin address.

I hope you found this guide to be helpful in your mining efforts. Any questions or comments please leave them below and I’ll respond as soon as I can.
Siacoin donations are appreciated or if you prefer you can share some of your mining time by running the Start.bat with my Siacoin address: 002d16d5194043c76beb5cc7d2d9f04c9657ce38ee692c25471302974c3c4e42040328d0c555